 |
|
Cropping Images |
|
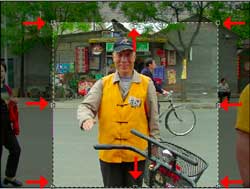
Cropping Images: Choose the Crop Tool (Shortcut is the C key). Draw a square or rectangle over the area that you wish to keep. |
|||
| The crop handles are indicated on the right by the red arrows. You can drag these outward or inward to select the area you wish to keep. The lighter area is the area that will be kept.
Dragging the corner handles inward will adjust both the height and width of the selection. Note: The shaded area can be adjusted by changing the color and opacity that are shown in the Crop Tool Bar once you select an area. |
 |
||
| If you wish to crop to a given size. For example you wish to have a 3" X 5" image you can set the height and width of the crop before you make your selection. If you want to crop one image to the same size as another image, select the image that is the size you want to use for your crop and click on Front Image on the Crop Tool Bar. This will set the crop size to the size of that image. Note: If you have trouble adjusting the crop tool it is most likely the result of setting a crop size. Clear the size and the tool should work fine.
Finalizing your crop - Press Enter or Return to crop finalize the crop process. You can cancel a crop by pressing the Escape Key. |
|||
| Straightening an Image with the Crop Tool |
|||
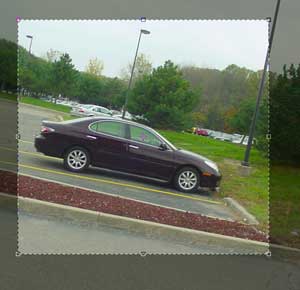
| Step 1- I intentionally took a very crooked image of a car in our parking lot. You can download this image by right click on image down load and choosing Save Target As. Image Download. Using the Crop Tool select the area you wish to crop. I have selected a fairly large area of the image. You can always adjust your crop area by dragging the handles in or out. |
 |
||
| Step 2 - When you place you cursor outside of the corner of the crop area it will turn into a small arc with arrowheads at each end. When you see that icon you can rotate your crop area by dragging to the right or left. At the right, I have drag the crop area to match the angle of the light post and to the curb in the front. These are two items that should be straight in the image. When you have the crop set where you want it press Enter or Return. | 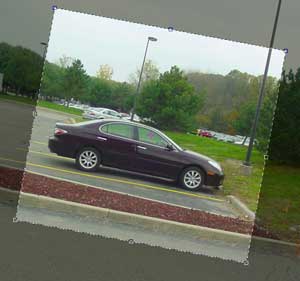 |
||
| Final Image - My final image is shown at right. I find using the crop tool to straighten images works better than using Elements straighten command or by rotating the image. | 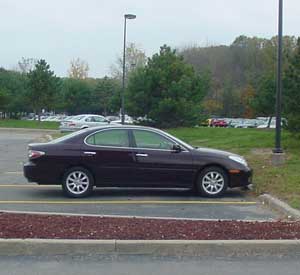 |
||
| Enlarging the Document Area Using the Crop Tool | |||
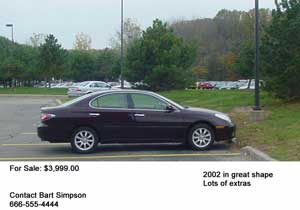
| You have most likely seen Christmas Cards or other images where you have an image and then a caption or greeting below the image or to the right. An example using our car image is shown at right. The picture with the details is ready to be posted on our local community sale board.
To add the white space do the following:
|
If you don't have Photoshop Elements, the next best thing is Picassa. Picassa is a great free program from Google.
|
||
| Home | Getting Started | Quick Fix | Images | Shapes | Text | Cropping | Vignettes |
| Animations | Print Layouts | Slide Show | Photo Gallery | Rollovers |
| Books | Web Sites | Classrom Ideas | Documentation | Buying a Digital Camera | About this Site |
These materials were created by Jim Wenzloff. You are welcome to reproduce them for educational purposes providing you include my name and the web address of the page. If you have any questions please contact .